Blog

And More Fine Art Nudes

And More Fine Art Nudes

A few notes on these photos.  The model and I likely did between 1000 and 1500 photos together.  On film.  Between approximately 2000 and 2003.  Lots of different types of portraits and toward the end a few very nice fine art nude sessions.

We were both quite comfortable shooting together by that time and as we shot at a studio space at the house my wife was comfortable with me photographing nudes as well.

Wanting to post some of these on Instagram I had to give them a painterly effect to get by their sensor ship algorithms.  Everything I use for the 'effects' are my own creation.  I create backgrounds and overlays from scratch in Photoshop.  And I use photos that I have taken for the backgrounds and overlays as well.

You can see more of this in some of my other posts. In this post (see link) photos of the animals, background and model are all mine:
Compilation Photo

If you are interested in getting some fine art nudes done or some very aesthetic boudoir, please feel free to contact me.

Posted by Martin in Blog, 0 comments
Keep On Learnin’ – My Photoshop Adventure

Keep On Learnin’ – My Photoshop Adventure

Keep On Learnin’

I’m pretty sure that anyone in the world should never stop learning.  I know, that for a lot of people, schooling kinda kills the willingness to continue finding stuff out. 

But there is a joy to creating things that can’t be beat.  Nothing like it.  A little while back, I figured some basic ‘how to’ things with Photoshop.  I know, it’s not that complicated but it just wouldn’t click with me. 

Then it did.

I’ve been playing with Photoshop since and having a blast.  I’m not in the class of some people that have been working with it for ten or twenty or thirty years. Or so.  But, I bet I’m having way more fun that most. 

This is adding a huge dynamic to my creativeness. 

The photo here started with a walk in the woods.  My wife thought that the tree stump with the lichen on it was kinda cool.  I took a few photos with my iPhone but didn’t have the quality that I wanted.  So, I hoofed it back up the trail the next day with my Nikon and took a bunch of shots with the angles and depth of field that I wanted. 

I had a vague idea of what I was going to do with these backgrounds.  I thought a couple of animals tucked in with a woodsy sprite.  I had to do a little searching of my data base.  Looking for some ‘zoo’ photos from many years ago.  Found a couple of decent shots of a tiger and a cheetah.  Some good poses.

The result is what you see here.   Plus a couple more.

Posted by Martin in Blog, 0 comments
How to Choose a Frame, Size and Shape for Your Photos

How to Choose a Frame, Size and Shape for Your Photos

How to Choose a Frame, Size and Shape for Your Photos

Golden Rectangle

Often when editing my photos with Lightroom, I’ll crop or shape the size to a ratio of 1.618 to 1.0  This is called the Golden Rectangle.

So, you would then have a rectangle with one side equal to 1.0 and the other 1.618.  Whatever size.  If the short side of the photo was 10 inches then the long side would be 16.18 inches.  For me this works way better for horizontal images than it does for the vertical.

An interesting note is that .618 to 1.0 is the exact same ratio.

Using Lightroom (Software I use for photo editing) you have various options for what is called overlay lines.  You can place these lines over the photo temporarily for size, shape and placement of objects in the frame.  One of the options is these intersecting lines that are the exact 1.618 ratio.  The Golden Ratio.  The four points where the lines cross: these are what you can use as a focal point.  The eye naturally goes to these.

Here you can see the 'overlay' of the lines with these measurements:

Then there is the positioning of the elements in the image. 

The ratio of 1.618 or .618 is then applied to the image itself resulting in four lines that intersect. 

Each line drawn from .618 distance from one edge. 

See here:

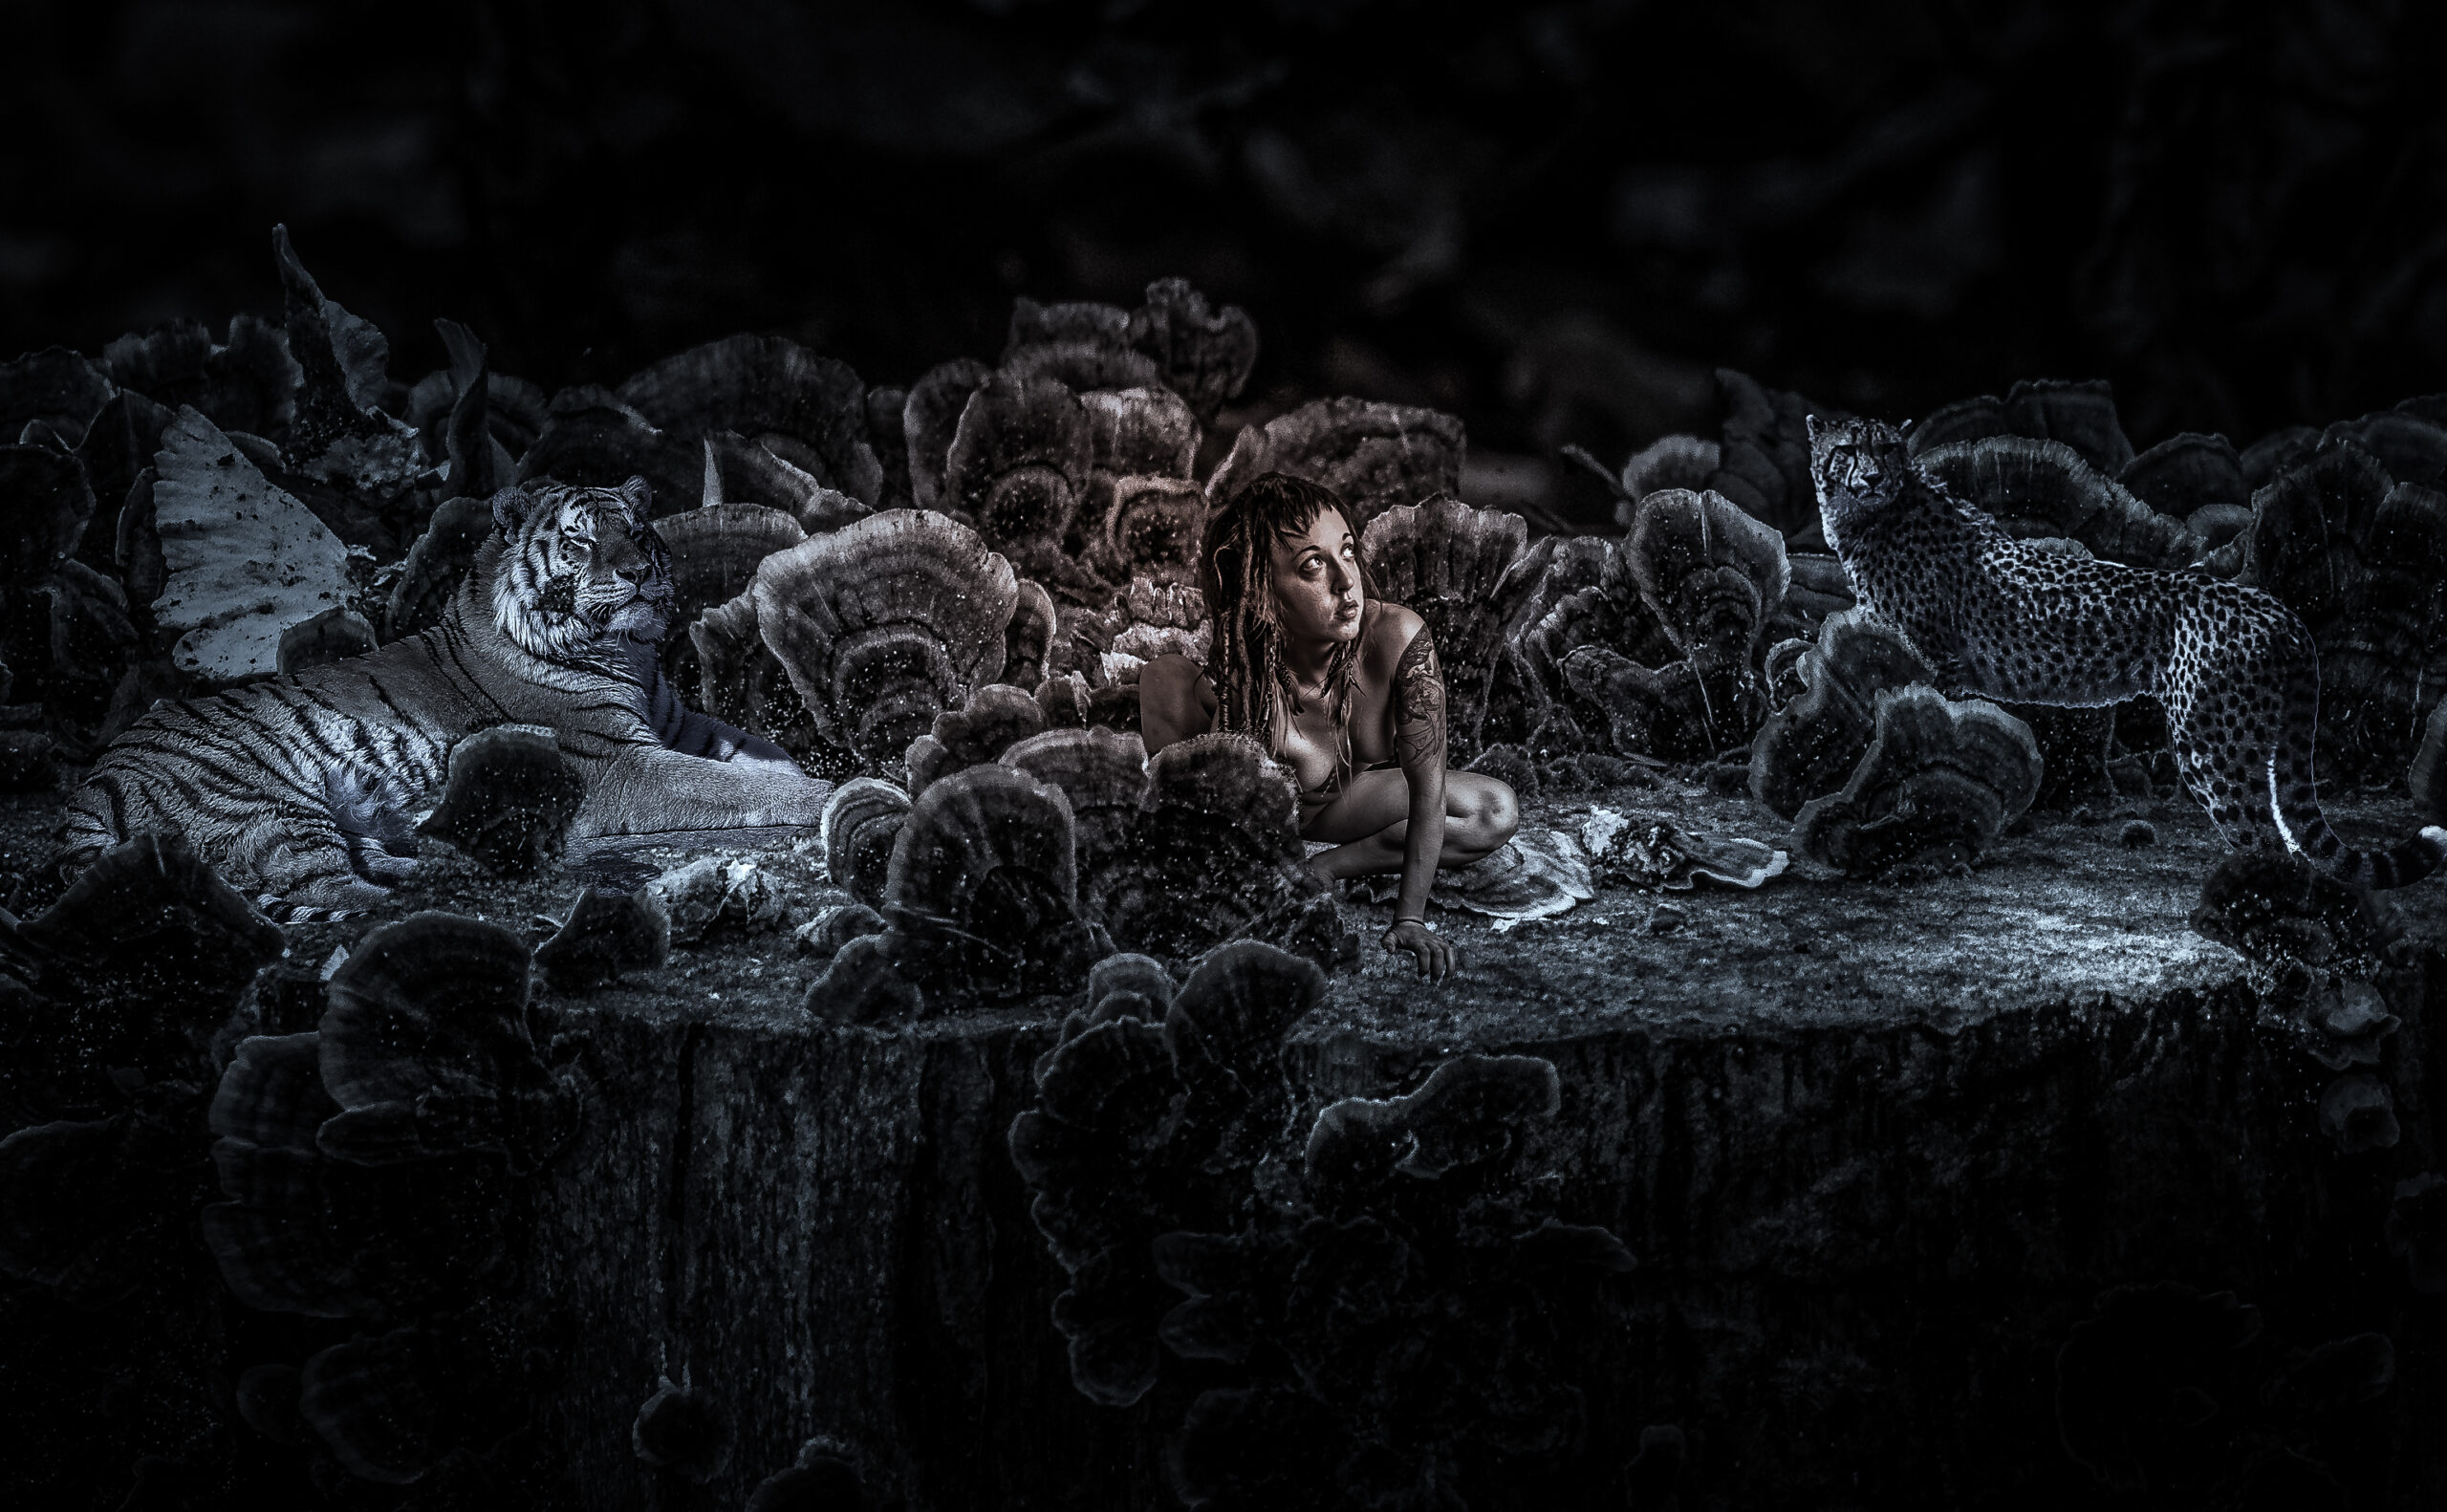
These lines and the four intersecting points are what you want to use for design or editing.  You could use one of the horizontal lines for the horizon as an example.  Upper line for less sky and lower for more sky.  That part is all about taste.  You can see in the above image, that the upper horizontal line is even with the horizon in the picture.  And the intersection of the top horizontal line and left vertical line are right on the eye of the cow.

A vertical line in a horizontal image might be used to place the main part of an object. 

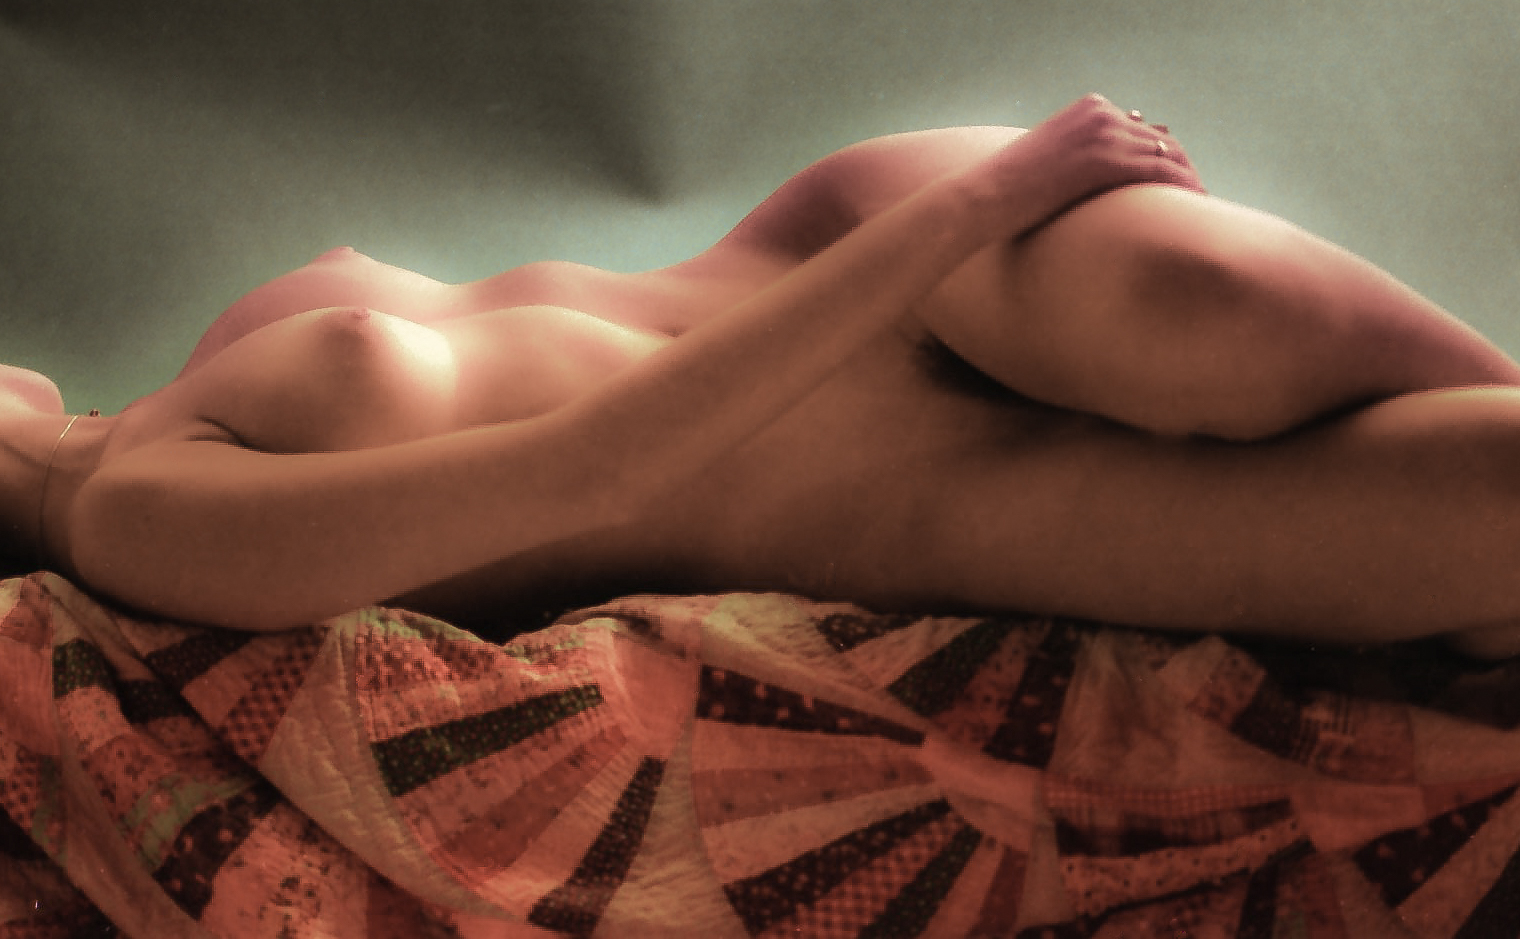
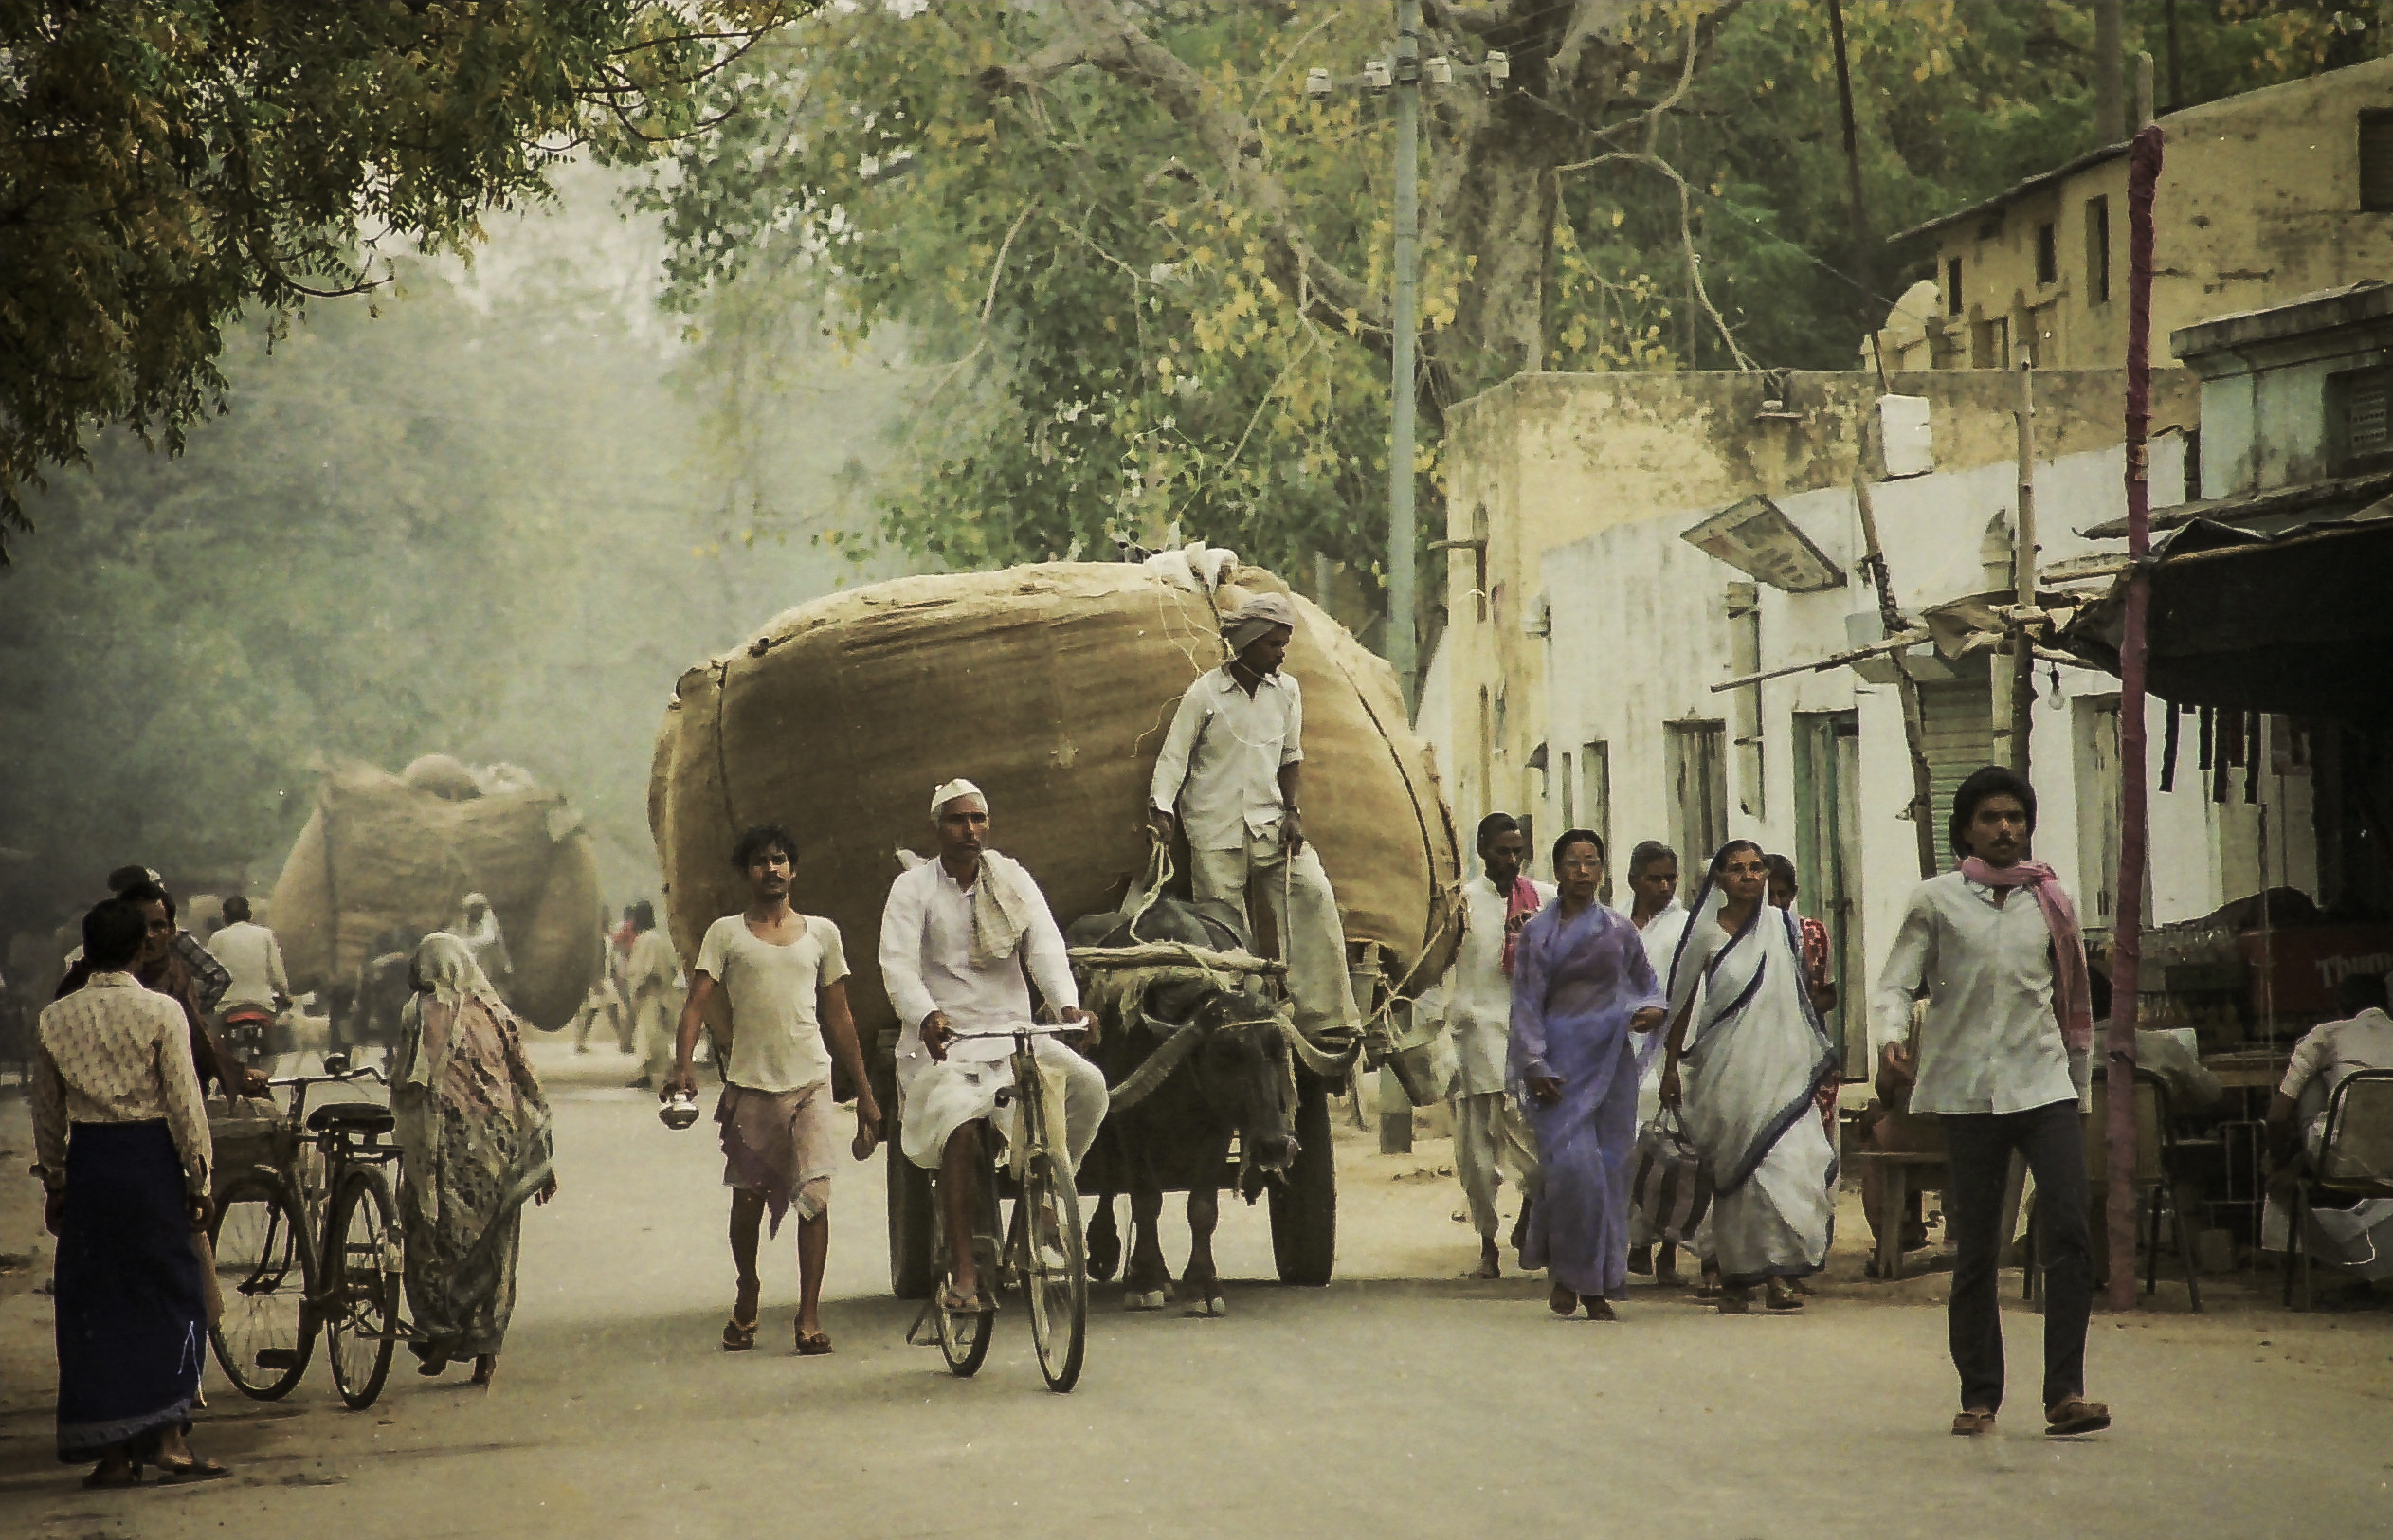
And again in the photo below, the bottom horizontal line is even with the horizon. 
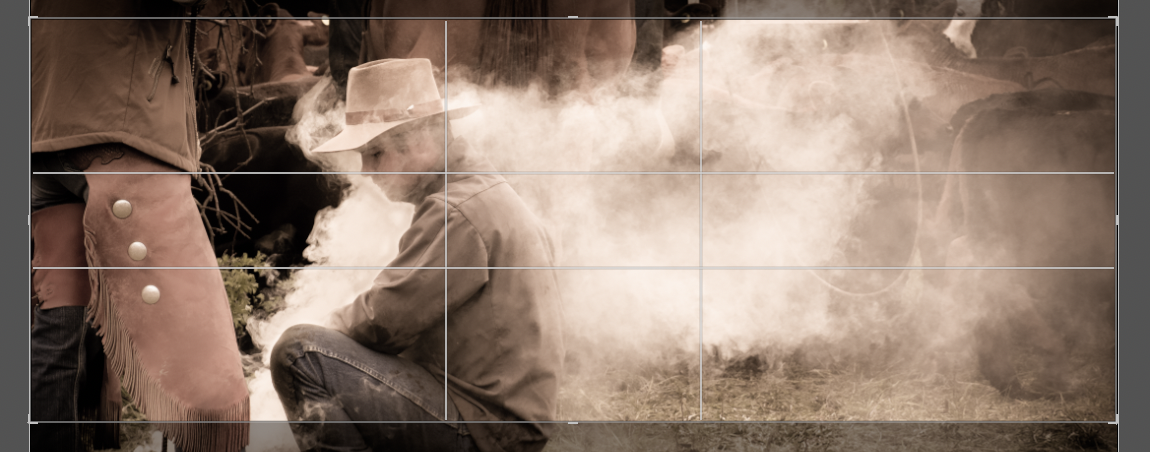


Intersecting Lines

The four points where the lines cross: these are what you can use as a focal point.  The eye naturally goes to these areas.

In this photo I have used the cowboy's eye as a focal point.

Framing

When I'm editing a photo I use this technique and post to my website or some other social media. Much more impact than an 8"x10".  It has a lot to do with the above information.  One can still use these ratios with other shapes of photos but generally less impact. 

The biggest issue, then, with producing prints and getting them framed, is that there are no standard frames made to the Golden Rectangle Ratio.  

When you wish to purchase, and have framed, a photo you like, you are limited to available framing.  None of which are true to the Golden Ratio.  The only way to do this properly would be to have your image printed with this ratio and get a custom frame.  Which can be costly.

The closest ‘standard’ size that I’ve been able to find is 11”x17”.  This size is slightly shorter from side to side. There are some other larger sizes that come close as well. 

I would edit the photo and object placement within the frame using The Golden Ratio on any shape image. 

I hope this helps.

Posted by Martin in Blog, 0 comments
Photos From In and Around Vrindaban, India

Photos From In and Around Vrindaban, India

My India Photos

Thirty five years ago I went to visit my father in India.  I took my camera and ten or twelve rolls of film.  I had to make every shot count. 

A lot of the children, when seeing me with my camera, would shout, “Photo, photo!” wanting their picture taken.  I took some but many times just pretended.  Not enough film.  If I went now, with digital, I would have shot everything.

Many of the photos turned out wonderfully.  If you look through them though, here on this page, the quality of the photos is somewhat lacking. 

I was unaware at the time there could be a difference in the quality of processing negatives.  I took them to a ‘One Hour’ place near where I lived.  Within a few short years the negatives deteriorated.  Way more than normal.  I still have negatives from fifty years ago from which I can get a decent print.  Not these.

So, just a caution if you use film, don’t go for cheap processing.

These days your digital images will last forever as long as you have them properly backed up. 🙂

Artistically, I still like many of these photos. 

Most of the photos are taken in a small town called Vridaban.  About a hundred miles south of Delhi.  Near a town called Mathura.  The people that I met there were by and large, as anywhere, very friendly and helpful.

Posted by Martin in Blog, 0 comments
Haunt Manor Crew Photos – Niagara Falls 22 Oct 23

Haunt Manor Crew Photos – Niagara Falls 22 Oct 23

Hello Haunt Manor Actors and Actresses!

Email me to be on my mailing list: martin@photo-photo.com

Please consider a donation for the work and the photos.
I get no pay for this otherwise.

$10, $15 or $20 is fine. 

(But don't be afraid to send more if you are feeling affluent 🙂 )

-------------->    <-------------

Keep scrolling for photos with special backgrounds


Go here for all the other photos


Posted by Martin in Blog, 1 comment